DocuSign - Sending
Two ways to access the sending screen:
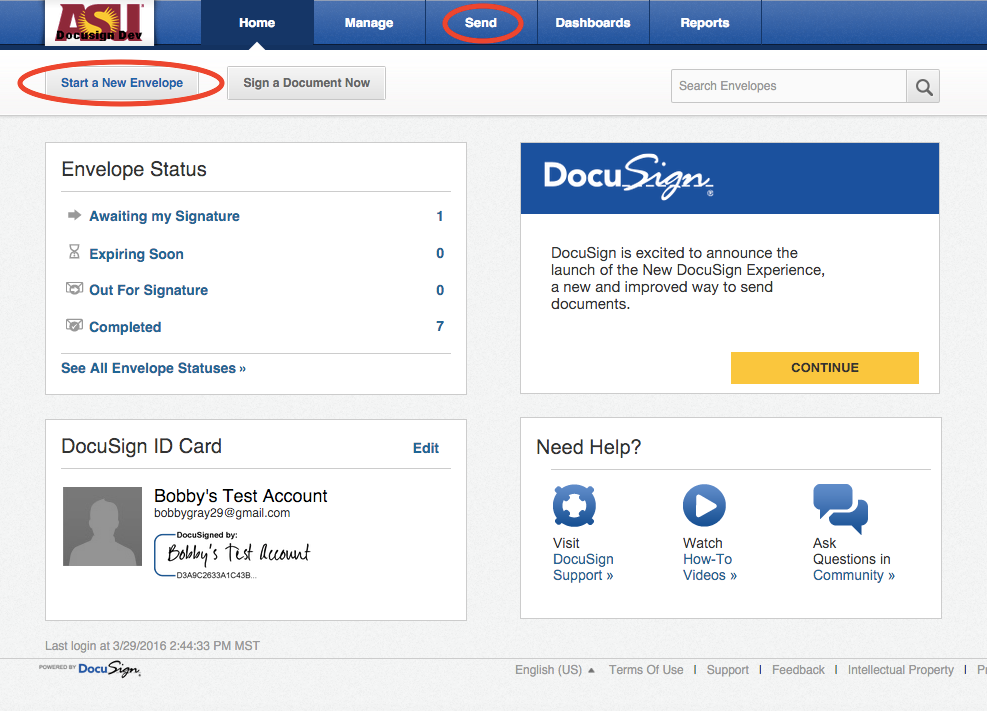
- From the DocuSign home page, select ‘Start a New Envelope.’
- Select ‘Send’ from the menu bar at the top of the screen.
The sending screen has several components – the document(s) to be signed, the recipients and routing, any specific message that you would want to add to the email notification that your recipients will receive, and any modifications to the default envelope settings.
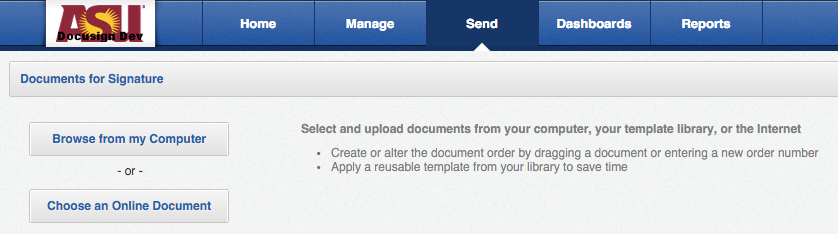
- Select the file that you want to be signed. Click Browse from my Computer to choose a file from your hard drive. If you are using a DocuSign template, click on Choose an Online Document and the select the appropriate template. Depending on if it is a template of your own or a shared template, you may then need to click on the Shared Templates folder to find the right template. Click Add once you have found the right template or document.
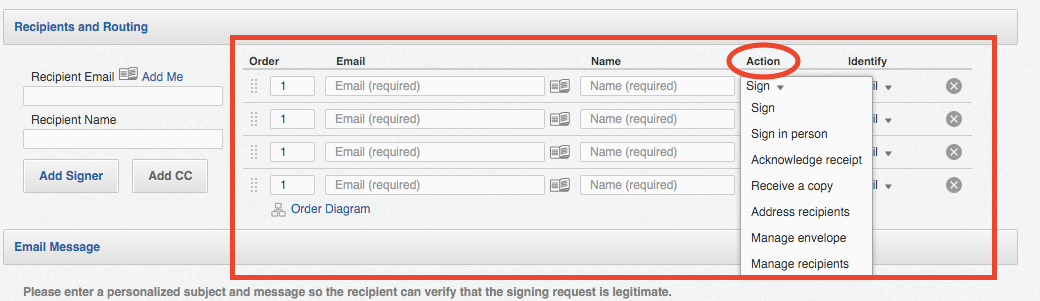
- Routing - Add the email address and name of the first recipient and then click ‘Add Signer.’ If you are sending something to yourself for a signature or to input discrete data as part of a workflow, click ‘Add Me’ and your name and email address will automatically be inserted. After you input the first recipient and click ‘Add Signer,’ a line for that recipient will be created on the right side of the screen (in red box). The order column allows you to select the routing order for the document. 1 indicates that it will be the first stage of the process. If two recipients are listed as 1, they will receive notifications simultaneously. Once those signatures are complete, the document will be routed to step 2, etc. If you click on ‘Order diagram,’ you will see a visual representation of the workflow to confirm that it is set up as you want it to be. The Action column allows you to choose the role of that recipient. The most common actions are sign (inserting any signature or other information onto the document) and receive a copy (cc).
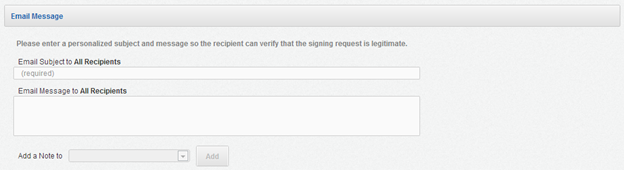
2. Customizing email subject and message - Scroll down to the Email Message section. Write the subject for the email notification in ‘Email Subject to All Recipients.’ If you would like to add specific content to the notification email that all of your recipients receive, enter that text into the text box ‘Email Message to All Recipients.’ If, however, you want to send a note to only a particular recipient, select that recipient from the drop down menu ‘Add a Note to _____________ ‘ and then insert the text that you want them to receive, before clicking on the Add button.
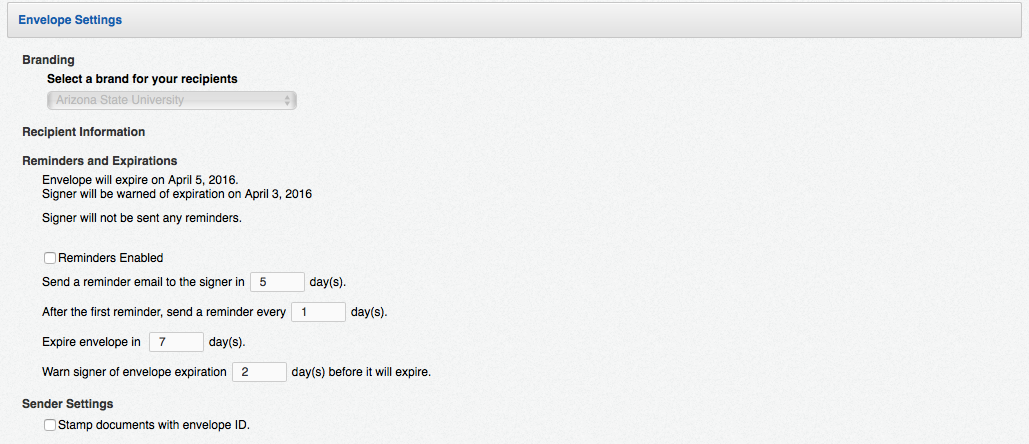
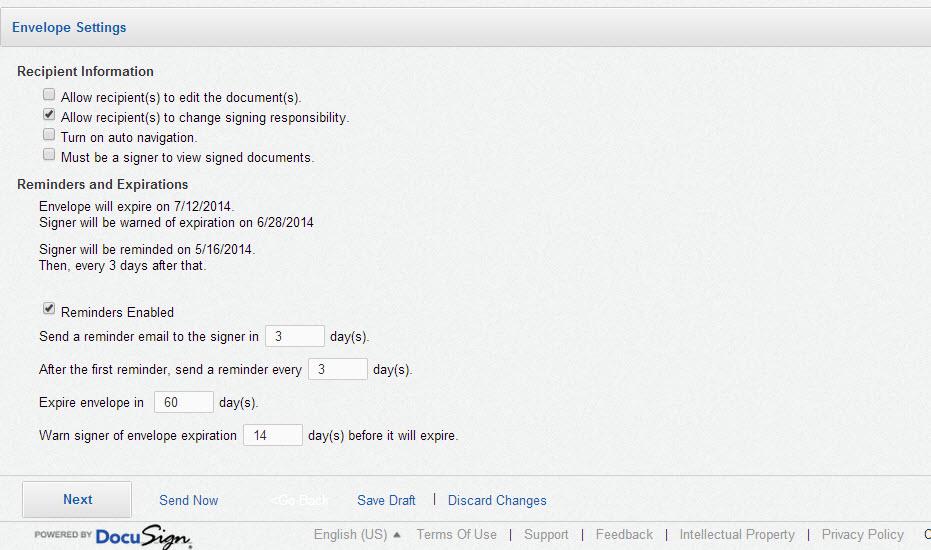
3. Reminders and Expirations - The default settings for reminders is that a reminder will be sent after 3 days and then again every 3 days that follow until the document is signed. It is set to expire after 60 days and send a warning notification about the expiration 14 days before it expires. Note that these are calendar days, not business days. You can disable reminders but you cannot disable expiration. If you do not want an envelope to expire, set a very long expiration date, like 999 days. Do not put 0 in the "Expire envelope in __ days" slot.
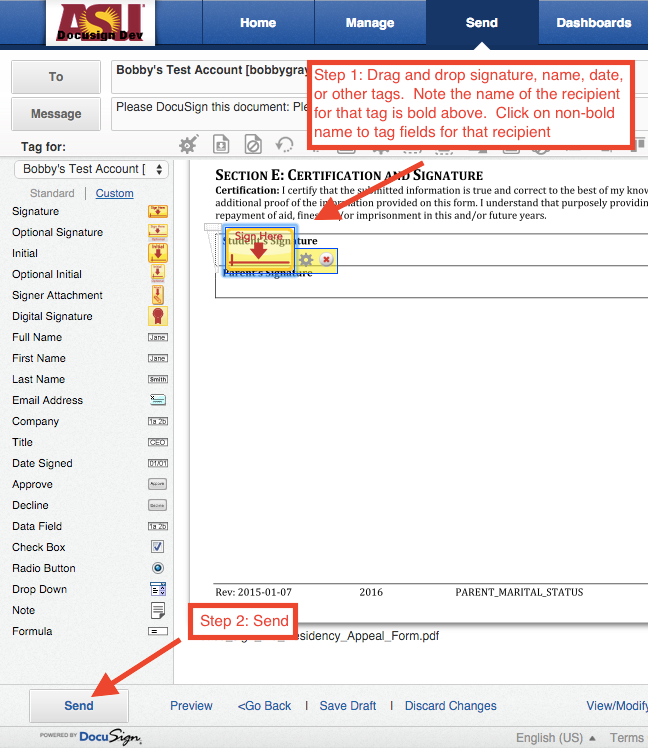
4. Send or Tag - If you are using a template that already has speificied tags (locations for where signing or other fields should populate on the document) or if you want to allow your signer to decide where to place those fields, you can press Send at the bottom of the screen. If you want to determine where the signature, date, initials, name, or other data appears on the page, click Next.
5. Tagging - Use the tagging screen to drag and drop fields for the signer to complete. The signer will be prompted to sign, initial, or enter data for most fields, but if you are using the 'date signed,' 'full name', 'first name,' last name,' 'email,' or 'company' fields, those will autopopulate.